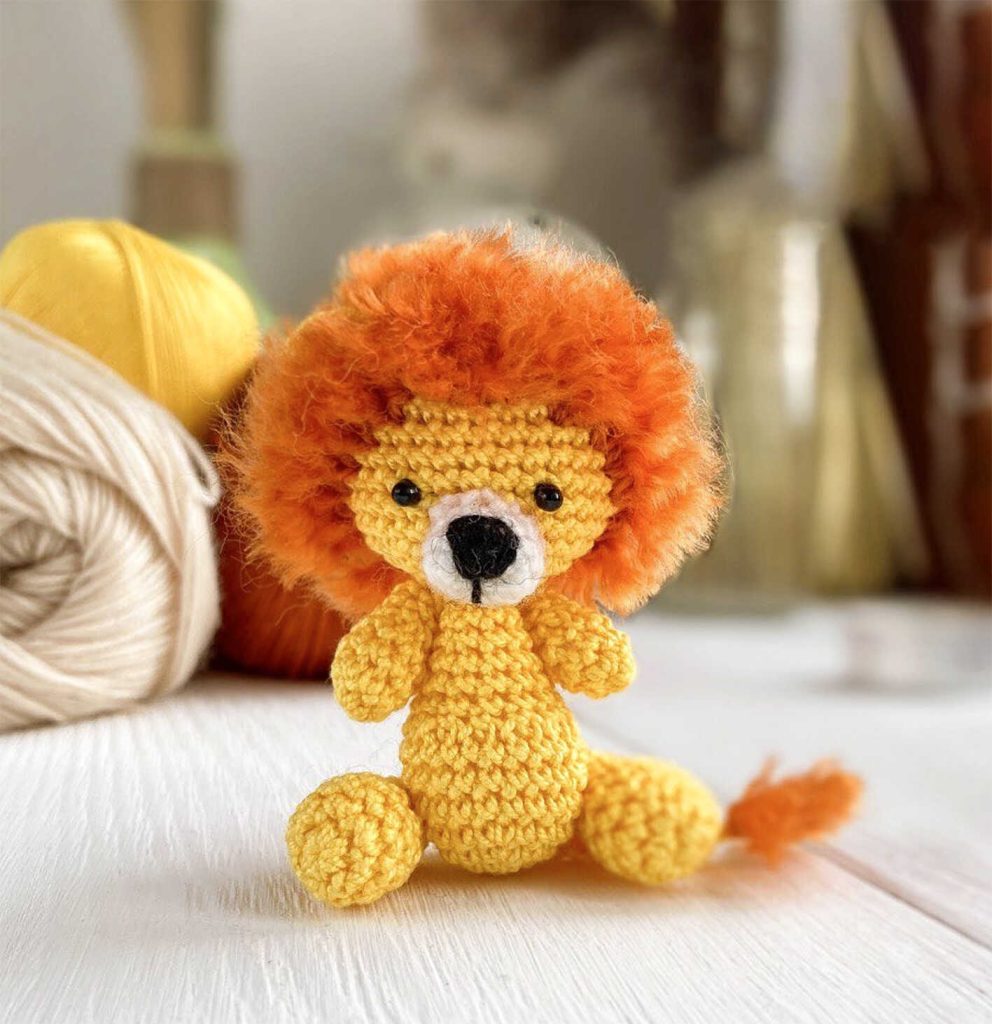
Tiny Lion Amigurumi for Beginner Crochet Projects
Designer: Nadia Lukhlina
Instagram: @scandistyle_dolls
Etsy Store: MiniCrochetZoo
Difficulty Level: Beginner
A tiny lion designed to add warmth to handmade collections
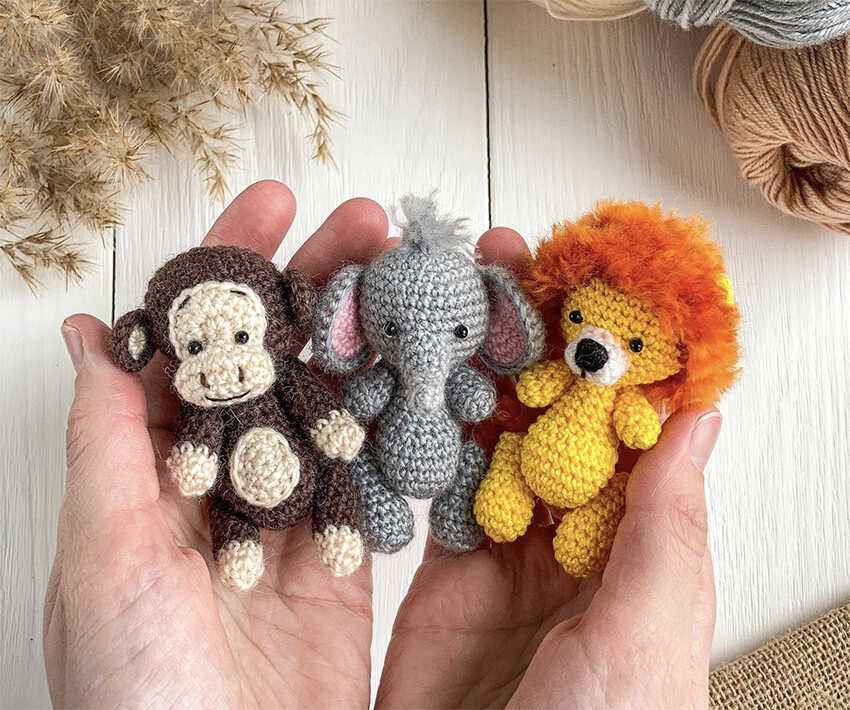
Mini Lion Amigurumi for Cute Animal Collections is inspired by the joy of small, meaningful handmade animals. With its soft shape and playful mane, this little lion is perfect for shelves, nursery decor, or thoughtful gifts, fitting beautifully into DIY Crochet Gift Ideas and Easy Crochet Projects. It is designed to be both decorative and heartfelt, and at the end of the pattern you will also discover lovely amigurumi lion ideas to grow your cute animal sets. Many thanks to Nadia Lukhlina for sharing this charming design with the crochet community.
This beginner amigurumi crochet pattern is ideal for makers who enjoy step by step, beginner friendly projects with a calm and satisfying flow. It suits anyone learning how to crochet amigurumi or looking for a Quick to Make Amigurumi that still feels polished. Difficulty Level: Beginner. If you have been wondering how to crochet an amigurumi animal that looks adorable yet stays easy to make, this pattern is a great place to begin, even for Low Sew or No Sew Amigurumi Patterns lovers.
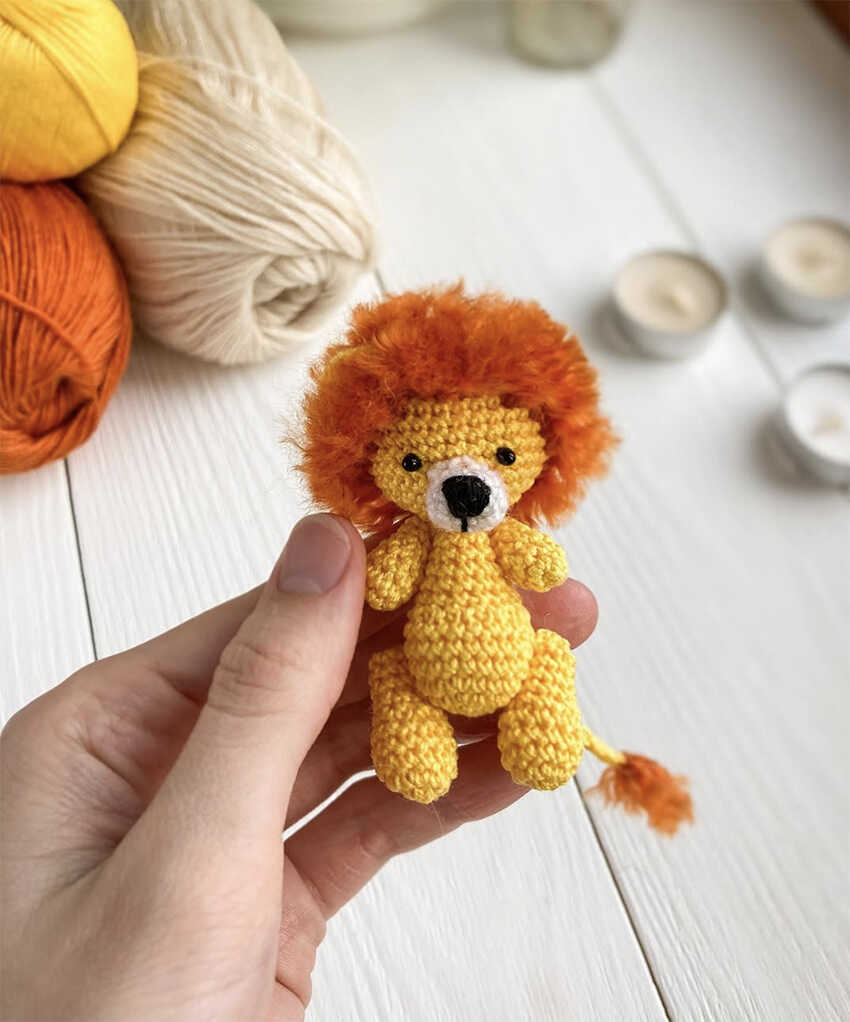
The pattern uses 100% cotton yarn (220 m / 50 g) for the body, Vita Brillant for the mane, and Iris YarArt yarn in black and white for the eyes, with a 1.5–1.75 mm hook, fiberfill, needle, and scissors. The finished lion is about 8 cm tall. While cotton gives a crisp finish, velvet yarn also works beautifully for a larger plush result. For more handmade animal inspiration, you may enjoy the creative idea shared in the capybara turtle backpack.
Materials:
• Yarn (I have 100% cotton 220 m/50 g) + Vita Brillant for mane
• Hook size: 1.5 – 1.75 mm
• Iris YarArt yarn (138 m/20 g) black and white for eyes or you can use 3 mm or 4 mm eyes
• Sewing needle and scrissors
• Fiberfill
Size of the lion is about 8 cm
Abbreviations:
MR– magic ring
ch– chain
sc– single crochet
inc– increase
dec– decrease
slst– slip stitch
TINY LION AMIGURUMI FOR BEGINNER CROCHET PROJECTS
Head:
1. 6 sc in MR
2. 6 inc (12)
3. (1 sc, inc)*6 (18)
4. (2 sc, inc)*6 (24)
5. (3 sc, inc)*6 (30)
6-11. 30 sc (6 rounds)
12. (3 sc, dec)*6 (24)
13. (2 sc, dec)*6 (18)
14. (1 sc, dec)*6 (12)
Fasten thread, cut and hide inside. Stuff.
Ears (make 2)
In turning rows:
1. 6 Sc in MR, ch, turn
2. (1 sc, inc)*3 (9), ch, turn
3. 9 sc
Leave thread for sewing
Snout:
White
1. make 4 ch, starting from second ch from hook: inc, 1 sc, 3 sc in 1 ch, 2 sc on back of chain (8)
2. İnc, 3 sc, inc, 3 sc (10)
3. 10 sc, slst
Leave thread for sewing. Stuff when sewing.
Body:
1. 6 sc in MR
2. 6 inc (12)
3. (1 sc, inc)*6 (18)
4. (2 sc, inc)*6 (24)
5-7. 24 sc (3 rounds)
8. 6 dec, (1 sc, dec)*4 (14)
9-11. 14 sc (3 rounds)
12. (5 sc, dec)*2 (12)
13. 12 sc
Leave thread for sewing. Stuff.
Legs:
1. 6 sc in MR
2. 6 inc (12)
3-5. 12 sc (3 rounds)
6. (2 sc, dec)*3 (9)
7-10. 9 sc (4 rounds)
Stuff. Pull the opening fasten thread and hide inside.
Arms (make 2):
1. 6 sc in MR
2. (1 sc, inc)*3 (9)
3-4. 9 sc (2 rounds)
5. (1 sc, dec)*3(6)
6-7. 6 sc (2 rounds)
Stuff. Pull the opening, fasten thread and hide inside.
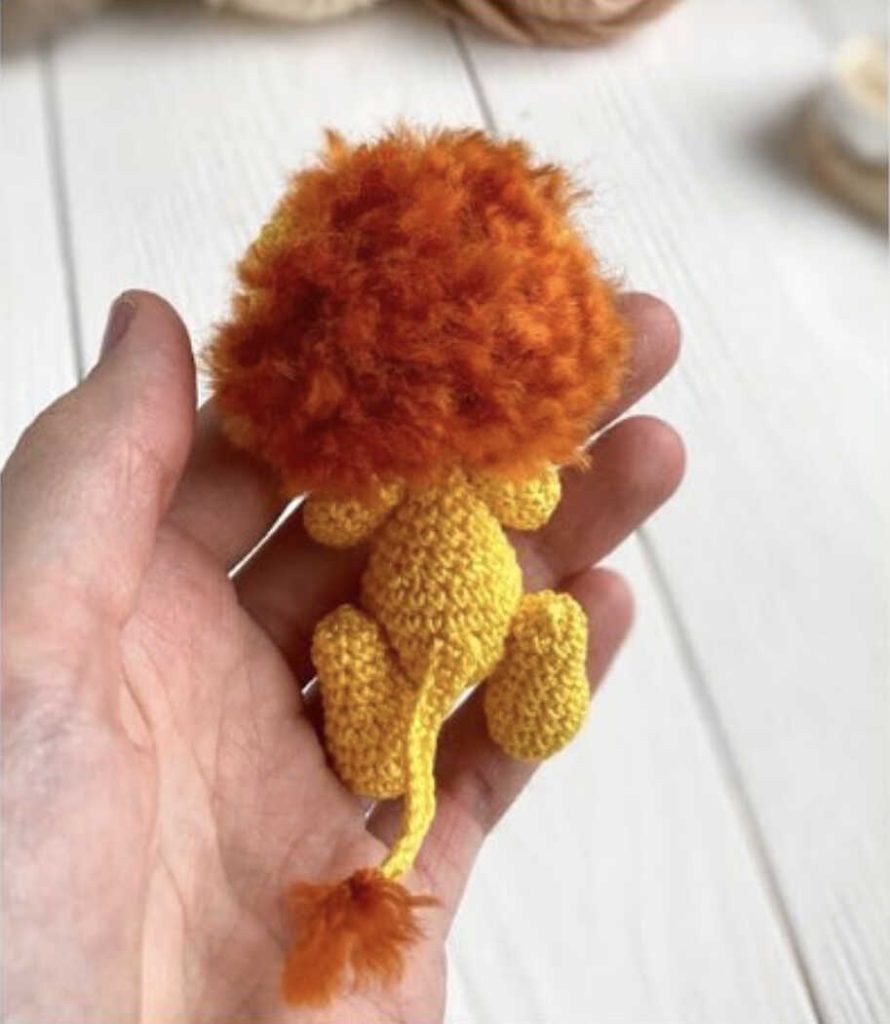
Tail:
Make 14 ch with yellow yarn, starting from second ch from hook crochet 13 sc. Leave thread for sewing. Make a tassel on the end of tail from orange yarn pieces and comb it.
Assembly:
1. Sew the muzzle on 9-12 rounds, embroider nose and vertical line on the snout
2. Embroider /glue /sew eyes between 8th and 9th rounds, there are 5 sc between the eyes
3. Make the mane (see description further)
4. Sew the head to the body
5. Attach arms using thread attaching (or sew) 1 round below the seam between head and body
6. Attach legs using thread attaching (or sew) between 4th and 5th rounds of the body on the sides
7. Sew the tail on the back of the toy on about 5-6 rounds
Mane:
Cut the orange yarn into pieces of approximately the same length (you can wind it on a piece of cardboard of the desired width and then cut it). Mark the line of mane on the head with pins and then thread the yarn sections along the marked line, removing the pins as you go (see photos). When the outer round of the mane (around the entire circumference of the head) is ready, start filling in the space inside.
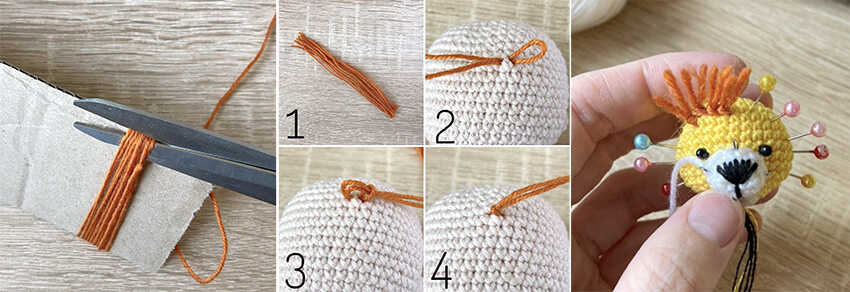
The fill density will depend on your yarn and whether or not it can be fluffed (combed). If the yarn can be fluffed up and it is quite voluminous, then you do not need to thread the yarn pieces into each stitch of each round, you can make gaps. In any case, you can always add or remove strands. When all the strands are thread, you need to comb the mane with a slicker brush (brus for combing animals) and trim it to desired length. I sewed on the ears after the mane, position them at your discretion and sew.