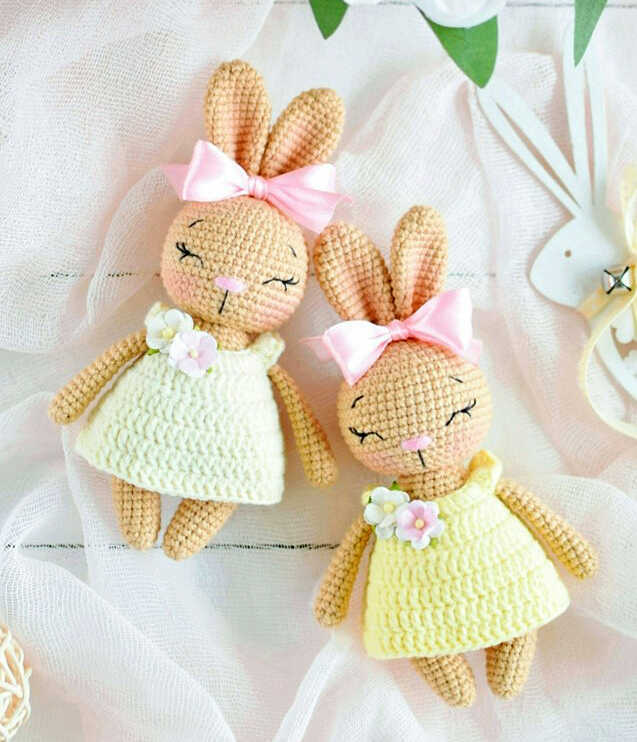
Crochet Bunny Amigurumi Free Pattern
Designer : Lyudmila Orlova
Instagram: ludaorlova_toys
Hello everyone who loves amigurumi…
Today I shared the amigurumi bunny crochet pattern for you. Below you will find a step-by-step tutorial of this pattern and you will complete it without any difficulty. Thanks to the creator for this cute pattern.
Amigurumi cats, amigurumi dolls, amigurumi dogs, amigurumi unicorns, amigurumi lambs, amigurumi dinosaurs, amigurumi foxes, amigurumi bears, amigurumi giraffes, amigurumi pigs, amigurumi birds, amigurumi bunny, amigurumi elephants, amigurumi hippos, amigurumi monkeys… All the amigurumi toy crochet patterns and ideas you are looking for are here. Have a great time…
Materials
1. Yarn:
-YarnArt Jeans 50g/160m, color No. 07 – for the body
-YarnArt Jeans 50g/160m, color #67 – for dress
2. Hook number 2
3. Filler – holofiber
4. Thick sewing needle, scissors, pins, knitting marker
5. A little black and pink thread for embroidery of the muzzle
6. Blush or dry pastel for cheeks
7. Button 1pc with a diameter of 8-10 mm
8. Satin ribbon 20mm wide (about 30cm long) and artificial flowers, brooch, buttons – any decor to your taste – for decorations.
Abbreviations
MR: Magic ring
Sc: Single crochet
Inc: Increase
Dec: Decrease
Ch: Chain
Sl st: Slip stitch
Dc: Double crochet
*The finished toys measure about 17cm (6.7 inches) (including the ears) in case of using the materials listed.

CROCHET BABY BUNNY ARIANA AMIGURUMI FREE PATTERN
Head
Rnd 1: 6sc in MR
Rnd 2: (inc)*6 (12sc)
Rnd 3: (1sc, inc)*6 (18sc)
Rnd 4: 1sc, inc, (2sc, inc)*5, 1sc (24sc)
Rnd 5: (3sc, inc)*6 (30sc)
Rnd 6: 2sc, inc, (4sc, inc)*5, 2sc (36sc)
Rnd 7: (5sc, inc)*6 (42sc)
Rnd 8: 3sc, inc, (6sc, inc)*5, 3sc (48sc)
Rnd 9-16: 48sc (8 rows)
Rnd 17: 3sc, dec, (6sc, dec)*5, 3sc (42sc)
Rnd 18: (5sc, dec)*6 (36sc)
Rnd 19: 2sc, dec, (4sc, dec)*5, 2sc (30sc)
Rnd 20: (3sc, dec)*6 (24sc)
Rnd 21: 1sc, dec, (2sc, dec)*5, 1sc (18sc)
Fasten and cut the thread, hide the tip of the thread inside the part. head stuff tightly.

Ears (Make 2)
Tie two parts, do not stuff need.
Rnd 1: 6sc in MR
Rnd 2: (inc)*6 (12sc)
Rnd 3: (3sc, inc)*3 (15sc)
Rnd 4: 15sc
Rnd 5: (4sc, inc)*3 (18sc)
Rnd 6-11: 18sc (6 rows)
Rnd 12: (4sc, dec)*3 (15sc)
Rnd 13: 15sc
Rnd 14: (3sc, dec)*3 (12sc)
Rnd 15: 12sc
Fold the edges of the part together, crochet 6sc.
Fasten the thread, cut, leaving a long end for sewing.

Handles
Tie two parts, in the process crocheting fill only the palm (first 4-5 rows), the rest don’t hit.
Rnd 1: 6sc in MR
Rnd 2: (1sc, inc)*3 (9sc)
Rnd 3-16: 9sc (14 rows)
Fold the edges of the piece together crochet 4sc.
Fasten the thread, cut, leaving a long end for sewing.

Legs and body
Stuff the legs and body tightly while crocheting.
Rnd 1: 6sc in MR
Rnd 2: (1sc, inc)*3 (9sc)
Rnd 3: (2sc, inc)*3 (12sc)
Rnd 4-5: 12sc (2 rows)
Rnd 6: (inc, 5sc)*2 (14sc)
Rnd 7-9: 14sc (3 rows)
Finish crocheting slst, fasten the thread, cut. Tie the second leg similar to the first, but do not cut the thread, but continue crocheting.

Rnd 10: crochet 7sc, cast on a chain of 4ch and attach it to the first leg where you finished crocheting (into the loop following the sl st). Next, crochet 14sc along the first leg, 4sc along the chain of air loops, 7sc (36sc)
Rnd 11: inc, 6sc, inc, 2sc, inc, 6sc, inc, 7sc, inc, 2sc, inc, 7sc (42sc)
Rnd 12-18: 42sc (7 rows)
Rnd 19: (dec, 19sc)*2 (40sc)
Rnd 20: 40sc
Rnd 21: 4sc, dec, (8sc, dec)*3, 4sc (36sc)
Rnd 22-23: 36sc (2 rows)

Rnd 24: (7sc, dec)*4 (32sc)
Rnd 25: 32sc
Rnd 26: 3sc, dec, (6sc, dec)*3, 3sc (28sc)
Rnd 27: 28sc
Rnd 28: (5sc, dec)*4 (24sc)
Rnd 29: 24sc
Rnd 30: 2sc, dec, (4sc, dec)*3, 2sc (20sc)
Rnd 31: 20sc
Rnd 32: (dec, 8sc)*2 (18sc)
Fasten the thread, cut, leaving a long end for sewing.


Design and assembly
Decorate the bunny’s face. For this mark the places with pins the location of the eyes, they are between the 14th and 15th rows of the head, distance between points is 7 sc, the width of the eye is 3 sc.

Between 15 and 16 rows embroider with horizontal stitches nose (nose width 3sc). Then embroider the mouth, eyebrows. Blush or blush with dry pastel cheeks.

After making the face, sew ears. Fold the base of the ear in half and sew as shown a photo.

Sew the ears on the crown itself, on the inside of the ear you can also apply some blush. Pin the head to the body with pins, firmly sew around. Sew handles symmetrically on the sides, stepping back from upper edge of the body approximately 4 rows.

On the bunny’s head, around the ears, tie a satin ribbon bow.

The dress
Make a chain of 28ch + 3ch lifting. When tying, leave the thread length about 20 cm, from it at the end of crocheting we will make a loop.
Rnd 1: Starting from 4th st from hook: inc in each st from dc (56 dc), turn
Rnd 2: 1ch lift, 8sc, 2ch, skip 12 loops of the previous row and continue crocheting in the next loop – 16sc, 2ch, 12 loops skip the previous row and continue crocheting in the next loop – 8sc (36sc), turn
Rnd 3: 3 ch lift, (5 dc, inc, dc) * 6 (42 dc), turn
Rnd 4: 1ch lifting, 42 sc, turn

Rnd 5: 3 ch lifting, 3 dc, inc from dc, (6 dc, inc from dc) * 5, 3 dc (48 dc)
Connect crocheting in a circle with slst, then crochet in circular rows, each row starting from ch 3 lifting and ending with sl st.
Rnd 6-8: 48 dc (3 rows)
Finish crocheting, fasten the thread, cut off, hide the tip of the thread.
With the thread that was left when dialing, make a chain of 5 ch (or other the required amount), form a loop and sew. sew on button. Decorate the front of the dress at your discretion, for example, decorative buttons, brooch, flowers (I used paper scrapbooking flowers).

More amigurumi bunny ideas:


