Amigurumi Chicken Free Pattern
Designer : Nadia Iukhlina
Instagram: scandistyle_dolls
Hello everyone who loves amigurumi…
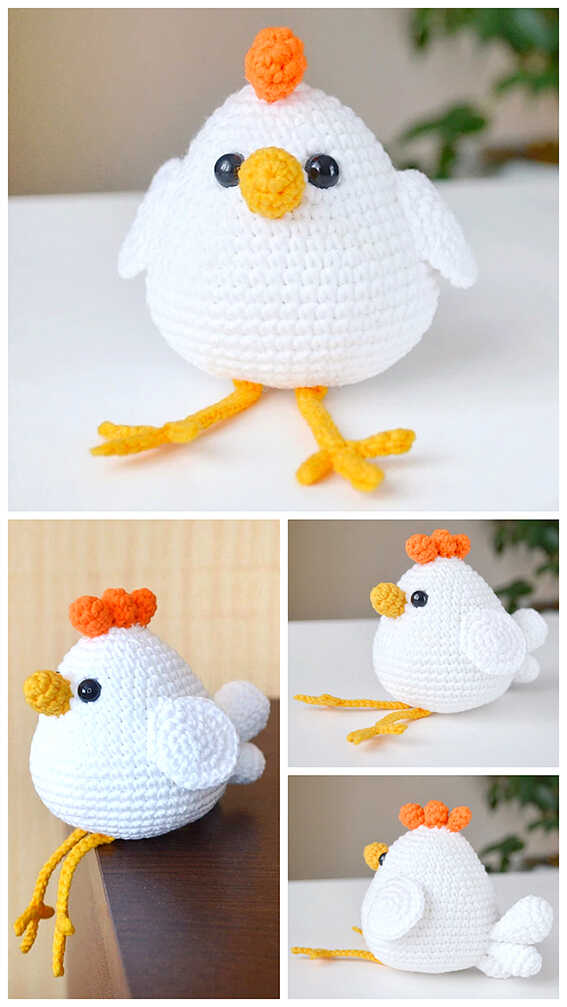
Today I shared the amigurumi chicken crochet pattern for you. Below you will find a step-by-step tutorial of this pattern and you will complete it without any difficulty. Thanks to the creator for this cute pattern.

Amigurumi cats, amigurumi dolls, amigurumi dogs, amigurumi unicorns, amigurumi lambs, amigurumi dinosaurs, amigurumi foxes, amigurumi bears, amigurumi giraffes, amigurumi pigs, amigurumi birds, amigurumi bunny, amigurumi elephants, amigurumi hippos, amigurumi monkeys… All the amigurumi toy crochet patterns and ideas you are looking for are here. Have a great time…
Materials
• Yarn: Vita Brillant (45% wool, 55% acrylic, 380 m/ 100g, fingering weight)in white, beige and a little of orange.
• Crochet hook size: 1.5 mm.
• Eyes size: 3 mm, glue.
• Polyester fiberfill, sewing needle, scissors, pins.
Size of the chicken is about 5 cm.
Abbreviations
MR: Magic ring
Ch: Chain
Sc: Single crochet
Slst: Slip stitch
Inc: Increase
Dec: Decrease
Dc: Double crochet

CROCHET EASY CHICKEN AMIGURUMI FREE PATTERN
Head and Body
Start with beige.
Rnd 1. 6 sc in MR
Rnd 2. 6 inc (12)
Rnd 3. (1sc,inc)*6 (18)
Rnd 4-5. 18 sc (2 rounds)
Rnd 6. (5sc,inc)*3 (21)
Rnd 7-8. 21 sc (2 rounds)
Rnd 9. (6sc,inc)*3 (24)
Change to white. Do not cut off the white thread, leave it in front of work.
Rnd 10. work in back loops only 24 sc.
Rnd 11. make 7 ch, work along the chain starting from the second stitch from the hook: inc, 5 sc, then continue working 24 sc around, next 6 sc along side of the chain (37).
Place marker, it will be the new round beginning.
Rnd 12. 2 inc, 16 sc, 2 inc, 16 sc, inc (42)
Rnd 13. 1 sc, 3 dc, with one top in one stitch, 40 sc (42)
Return to the beige thread. Work with beige thread in front loops of 9th round: (4 ch, skip one stitch, 1 sc in the next stitch)- repeat like this to the end of the round, finish with a slst.
Cut off the thread, weave in.
Now continue working the white part of the chicken.
Rnd 14-17. 42 sc (4 rounds)
Decreases in rounds 18-20 are exactly in front and back of the chicken.
Rnd 18. 1sc, dec, 19sc, dec, 18sc (40)
Rnd 19. (dec, 18sc)*2 (38)
Rnd 20. (dec, 17sc)*2 (36)
Rnd 21. (4sc, dec)*6 (30)
Rnd 22. (3sc, dec)*6 (24)- stuff.
Rnd 23. 12 dec (12)- stuff to the end.
Rnd 24. 6 dec
Tighten the stitches with a needle.
Cut off the thread, weave in.


Wings (Make 2)
White.
Rnd 1. 6 sc in MR
Rnd 2. 6 inc (12)
Rnd 3-5. 12 sc (3 rounds)
Rnd 6. (4sc,dec)*2 (10)
Rnd 7. (3sc,dec)*2 (8)
Rnd 8. (2sc,dec)*2 (6)
Tighten the stitches with a needle. Cut off the thread, leave a thread end for sewing.
Bring the thread to the middle of the inside part of the wing.
Beak (Orange)
Rnd 1. 4 sc in MR
Rnd 2. (1sc,inc)*2 (8)
Cut off the thread, leave a thread end for sewing. Do not stuff.
Assembly
1. Glue the eyes between 4th and 5th rounds, there are 7 sc between the eyes.
2. Sew on the beak on rounds 5 and 6 in the middle between the eyes.
3. Comb: moving from the back to the beak. Insert the hook under a stitch of the second round (closer to the back), attach orange thread, then make 3 ch, work 1 sc under the next stitch (it’s in the first round alredy), again make 3 ch, then 1 sc under the next stitch of the first round, 2 ch and 1 sc under a stitch of the second round.
Cut off and secure the thread, weave in. See photo.
4. Sew on the wings on the sides of the body. I have them approximately in rounds 7-13 counting from the bottom.

Congratulations, you have completed the amigurumi chicken pattern.
More amigurumi chicken ideas:


